Sunday, May 27, 2012

Orly Flash Glam FX Can't Be Tamed Over Orly Faint of Heart

Today I have another polish from the Orly Flash Glam FX Collection. I went back to Sally's a few days ago and picked up the final one that I had been eyeing, Can't Be Tamed. I purchased and wore Sashay My Way and Mermaid Tale and posted about them over the last week.


To do this mani, I first used two coats of Orly Faint of Heart. Faint of Heart was really easy to apply, I definitely needed two coats because it was on the shear side, but it went on really even and leveled out nicely. It's hard to tell from the pictures but there are little subtle darker specs in this polish, it reminds me a bit of Misa Grey Matters.

Then I put an uneven coat of Orly Can't Be Tamed over about half of my nail, and put another coat just towards the tips. Finally, I put a coat of Seche Vite on top to even it out. This polish didn't have any holo glitter like the other two I purchased from the collection, but I really am digging this one. It has some medium sized purple hex glitter, and some small dark silver glitter in it.


I also just wanted to share the pictures I snapped on my cell phone when I picked up this polish of the other two glitters that I didn't purchase. These aren't the best quality, but I know there aren't a lot of swatches available of these polishes so I figured any info might be helpful! The other two colors are Be Brave, pink holo bar glitters, and Spazmatic, all blue glitter that looks about the same as Can't Be Tamed.
Be Brave

Spazmatic

Friday, May 25, 2012

Black and Gold Microbead Mani

Today I have a mani that has been on my 'to try' list for a while! I am sure you have seen this type of mani before. It's been making it's rounds in the blog world, and there is a kit you can actually purchase from Ciate to do this, but it costs about $25. They call it a 'caviar mani'. However, many girls are actually going out to craft stores like Michael's and purchasing microbeads to do this! I got a pack of 6 different colors of microbeads at Michael's for $6.99. I have read that, as you can guess, this isn't the most practical mani! It's more of a special occasion deal, because the beads don't last forever. I actually was waiting to do this because I had a wedding coming up, and I choose black and gold because my dress was black, and my jewelry was gold.


To do this mani I started by adding one coat of Orly Liquid Vinyl to my nails. Then, one at a time I added a second coat, and dipped my wet nail into my mixed up black and gold beads.Then I pushed down the beads to help secure them onto my nail, and kind of rubbed off the beads that were sticking outside the nail. I actually didn't get a full clean up done before I took these pictures because I did them about 30 minutes before I had to leave! I wasn't sure how long they would really last. I was surprised how well these hung on though, I had lost some beads through the night, but honesty I could have worn this for another day if I wasn't making a cake the next morning! I thought it would be a bit odd for my mom to find microbeads in her birthday cake, lol.

The beads!

This is the necklace I wore with my dress!

Thursday, May 24, 2012

Orly Flash Glam FX Mermaid Tale on China Glaze Smoke and Ashes

Hello! Today I have the other polish I purchased from the Orly Flash Glam FX Collection, Mermaid Tale. I posted about this collection few days ago when I wore Sashay My Way. Since there was some interest in the collection I thought it would be good to try out this one! I love it!

Sunlight

To do this mani, I started with two coats of China Glaze Smoke and Ashes, below, from their Hunger Games Collection. I have posted about a few of the other polishes in this collection - here and here. I was in love with the application on this polish - I think I could have gotten away with one coat for sure, two coats is just habit I guess! This polish has specks of blue in it, a few other colors are noticeable in the bottle, but don't really seem to translate on the nail.

Indoor

Then, on the top half of the nail I painted some uneven tips of Orly Mermaid Tale. Then I went and added a little more glitter just to the top fourth of my nail, to give it a more gradual look. Then I put a coat of Seche Vite on top. I really love how this glitter looks over black, I tried layering it over some other colors on my nail wheels, but it just stood out so much better over black. Putting it on Smoke and Ashes was nice because it brought out the little blue/green flecks in the black!

Indoor

Sunlight


Wednesday, May 23, 2012

OPI DS Extravagance

Today I have a beauty! This is two coats of OPI DS Extravagance, with a coat of Seche Vite on top. These OPI Designer Series polishes are quite expensive in my opinion, at $12.50 a bottle... and I have been eyeing them for a long time not quite willing to pay full price for them. Well, I was at Ulta with a $5 off coupon - so it seemed like a perfect time to try one of these DS polishes! I also realize that you aren't really supposed to put a top coat over holos, because it diminishes the effect a bit - but I was in a hurry and didn't have the patience to let it dry on it's own. Seche Vite has me spoiled because it dries so darn fast! The application on this was great, it applied so smooth and I just loved scattered holo effect in the sunlight! Even with a top coat on it, it's a stunner!


PS - I finally found a free watermark program I like. I downloaded Visual Watermark and I'm digging it :) It feels good to finally have a watermark on my photos :)

Tuesday, May 22, 2012

China Glaze Celtic Sun and Color Club Warhol Tape Mani

Today's mani was my first time using my striping tape. I have seen these mani's in every color and pattern... and I usually will tell you where I got my inspiration, but I honestly don't know the first place I saw this idea! I started with my left hand, which I normally photograph, and made a bit of a mess... but I got much better at the technique when I moved along to my right hand. Either way, here are the pics!


To do this mani, I started with three coats of China Glaze Celtic Sun, below, with a coat of Seche Vite on top. This color was really shear, and even after three coats I could still some streaks. It's not showing up very bright in these pictures, but it really is a bright highlighter yellow.


I wish I had taken a picture of the next step, but I forgot! After this was dry, I laid down 4 stripes of metallic striping tape that I had ordered for a few dollars on Ebay, then painted a coat of Color Club Warhol over it. While that was still wet, I peeled off the tape, and added a coat of Seche Vite on top.


Here is a picture of my right hand, the lines on the accent nails are much cleaner! I just can't quite pose this guy properly though, lol. Thanks for looking!


Ps - I just tried a free online program to add these watermarks, it doesn't give you many placement options. It's a work in progress! 

Monday, May 21, 2012

Orly Flash Glam FX Collection - Sashay My Way

Today I have a new polish for you that I found at Sally Beauty on Friday. I went into Sally's, and was surprised to see this new Orly collection because I hadn't seen anything about it yet! I even tried a search on my phone while I was at the store, and nothing came up! This collection is called Orly Flash Glam FX, and it's a line of glitters that can be worn alone or layered over black. I was tempted by all of these, but held back and only bought two. Here is one coat of Orly Sashay My Way over two coats of Orly Liquid Vinyl, with a coat of Seche Vite on top.

Sunlight

Indoor

Sunlight

I took the last out of focus picture on my cell phone, out in the sunlight, because it allows you to see a little of the different colors this polish flashes. Even though the bottle of polish was jam-packed with glitter, I still had to do a little maneuvering of the glitter to make sure it was positioned on my nail the way I wanted - you can kind of see where I had some trouble on my ring finger and pinky. I also had a bit of bubbling because to get the amount of glitter I wanted, it ended up going on pretty thick. Despite all of that, I really am liking the combination of little golden holographic hexagon and bar glitters, and it looks amazing out in the sunlight.

Since I bought one of the other polishes in the collection, I put them both on wheels so I could share with you. First, this is a pic of the display at Sally's that I snapped on my cell phone... sorry it's crooked! The clearance table was blocking me... lol.


This is Orly Mermaid Tale. It looks blue-ish in these pictures, but it's actually more of a kelly green color. You can see it better in the picture of the display. In order, is one, two, then 3 coats over nothing. Then one and two coats over black. One coat over black is really pretty in person! This one had a more even application than Sashay My Way and I didn't have the issues of trying to push the glitter around to get it positioned properly on the nail.


Just like the previous picture, this is one, two then three coats of Sashay My Way over nothing. Then one and two coats over black. Hope this was helpful! Thanks for looking.

Friday, May 18, 2012

Orly Melt Your Popsicle & Cover Band Sticks n' Stones


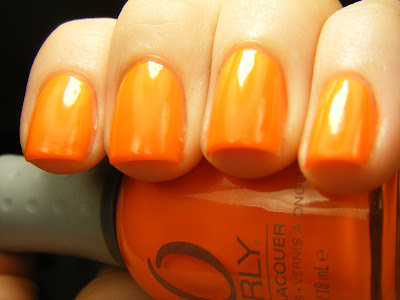
This is three coats of Orly Melt Your Popsicle, with one coat of Cover Band Sticks n' Stones on top, followed with a coat of Seche Vite. Melt Your Popsicle is one of the polishes from Orly's Feel The Vibe Collection. The real star here, however, is Sticks n' Stones. You can find this indie polish at Ninja Polish, the same place that I ordered Floam from! It's a polish they created to be similar to the hard to find Lynderella Connect the Dots. It's another unique polish that I had been wanting ever since I had seen a swatch of it. It's out of stock, but you can sign up for e-mail notifications for when it comes back.

Below is three coats of Melt Your Popsicle, under two different lights. It's hard to capture the bright neon of this polish on my camera! The second picture is closer, but the third I actually took on my cell phone at work - I think it's the closest to the true color.


Wednesday, May 16, 2012

Nail-venturous Floam!!!


Today I have the amazingly wonderful and beautiful, Nail-venturous Lacquers Floam!! Ever since I laid my eyes on this polish, I had been feigning for it. If you are not familiar with Floam, it's made by Amy at I'm Feeling Nail-Venturous. It's packed with neon green and blue micro glitters and is the most beautiful and unique polish I think that I have ever seen. She sells her polish in her Etsy Shop, and the girls at Ninja Polish sell it for her also (which is where I got mine). It's currrently out of stock, but you can sign up for e-mail notifications! It's hard to get your hands on... I may or may not have had my heart beating faster than normal when I was going through the checkout, lol. It's worth the effort! I love it. This is three coats, topped with a coat of Seche Vite. The polish was a bit thick, and the brush was a little wonky, but it doesn't even matter. I love it!


Monday, May 14, 2012

China Glaze Flip Flop Fantasy Gradient


Today I have a really fun gradient. I have done sponge gradients before, but I saw a new technique on Wacky Laki so I had to try it. She also gave a link to a video about the technique that Layniefingers posted. To do this mani I started with three coats of China Glaze Flip Flop Fantasy, with a coat of Seche Vite on top, below. This picture doesn't do this polish any justice! It's a beautiful bright pink neon... and it barely looks neon at all in my pictures! Lame.


To do the sponging technique I mentioned, I used three colors and painted them directly on the edge of the sponge. I used China Glaze Flip Flop Fantasy, Color Club Warhol and Milani Cool Vibe. As you can see in the below pictures, I painted 3 stripes that touched each other onto the sponge. I put it on fairly thick because the first line or two will soak right into the sponge. Then I put it over the nail and bounced it up and down until I got the desired look.


As you can see it made quite a mess! I repeated this on each of my nails, using a new sponge each time. Then I followed it with Seche Vite top coat. The pictures don't really show off how bright this mani was. It was bright neon and it practically was glowing in the sun. It was also a much more subtle gradient then the way my pictures seemed to want to capture it... I really loved it! It's a fun technique to try and it would be great for lots of different colors.

Saturday, May 12, 2012

Harmony Gelish Tiger Blossom & OPI Servin' Up Sparkle Gel Mani


Today I want to share the gels that I wore for a while to make myself focus on final papers and exams instead of playing with my nails and wanting to blog! I got a Harmony Gelish starter kit from Sally's around Christmas time and have really only used it on myself three times (check out my one other post). My friends and family really love the gels, so I thankfully have gotten use out of it - but mostly I just want to change my nail polish too often for me to like having the same color on for 2 entire weeks! I am sure there are many of you out there that can share this feeling :)
I thought I would give a bit of a description on how to use the gels, and a few tips for application.

In the starter kit from Sally Beauty, they have the Mini Gelish Ph Bond, Mini Gelish Foundation, Mini Gelish Top It Off, Mini Gelish Nourish, Mini Gelish Cleanser, and Mini Gelish Artificial Nail Remover.


You start by using a lint free wipe, and wipe off the nail with the Nail Surface Cleanse, and follow it with the Ph Bond. Next you put on one thin coat of the Foundation, and be sure to wrap the tips of your nails. To get the gels to cure, you need to place them under a UV or LED light because they won't dry on their own like regular polish. I really like the Gelish Mini Pro LED Curing Light I got from Sally's, because the Gelish Mini UV Light was the first one I got, and it was cheaper however it was a 3 minute cure time. This one is a bit more expensive but the cure time is 45 seconds, and I just feel like it does a better job. Below is a picture of the LED light I use.

The foundation layer only needs cured for 20 seconds, but all of the following layers will be cured for 45 seconds. The nice part about this light is that it has an automatic timer on it so it turns off after 45 seconds. I love that part!

Next you choose your color and place one thin coat of polish on, again, wrapping the free edge of your nail with polish in order to help your mani last longer. Cure it under the LED light for 45 seconds, and continue with a second thin coat of the color, and cure it. Another tip would be to make sure you paint as neatly as possible so that you don't get the polish to touch the skin around your nail because the mani may not last as long for you.

When you are happy with the amount of coats you have on, you can follow it with the Top It Off, sealing the free edge of your nail, and then curing it for 45 seconds. The mani will remain tacky until you cure the final top coat and then use the Nail Surface Cleanse on your lint free wipe, and wipe off your nail. Then it's all done! Another tip would be to stay away from cotton balls during your gels, because the lint will find it's way into your mani!

Is this a long enough post yet? Sheesh! I did ONE more weird thing that I hadn't tried before... I wanted to see if I could put regular polish in between the layers of my gels. Before I put on my Top It Off, I put glitter on the top half of my nails, and waited for it to dry completely, and followed it with Top It Off. I noticed that some of the gel color came off on my regular polish brush, so I don't think that these gels and regular polish like each other. I also had a few glitters leave my mani during the time I wore it because I don't think the top coat was really thick enough to contain them. Either way, it was an interesting thing for me to try. Now... on to the pictures of the mani! For this one, I used two coats of Gelish Tiger Blossom, followed by covering half of my nail with OPI Servin' Up Sparkle.


I actually only wore this mani for 10 days, I just was ready for a change (it could have lasted longer)! I also had lost a few glitters from the mani, and it was a little rough so I kept getting my nails snagged. I just had to change it. Below are a few pics to show how the mani held up after 10 days. Thanks for looking!


Friday, May 11, 2012

China Glaze Fast Track

I can't believe I have been away from blogging for so long! I swear I have an excuse, and lots of posts to share as an apology - lol. I got crazy busy with final exams/ papers, and gave myself gels for a few weeks to make me focus! Then I managed to plan something every day the week after school. But now that is all over, and I can finally do some posting!

Today I have two coats of China Glaze Fast Track, another polish from the Hunger Games Collection. I have used two others from this collection, here. This also has a coat of Seche Vite on top. I was really happy with this polish, the application was good and I couldn't stop staring at the yummy gold shimmer. Now for some pictures :)