Wednesday, February 29, 2012

China Glaze OMG Cloud Mani

Hi Everyone! I am sad I haven't posted in a while, and it's because my internet went out for 5 days - when I actually had the time to blog! Oh well, it's fixed now... and I am happy to get a chance to update my posts. I got this idea from 365 Days of Color, she calls this a cloud design. I love that you can do this in any color combination you could imagine, and it's not too difficult or time consuming to do.


To do this mani, I started with the gorgeous holographic China Glaze OMG, below.


Then, I did three stripes in different lengths of Sally Hansen Fairy Teal.


Then, I did the same thing with Zoya Megan in slightly shorter stripes so that the teal would show through underneath.


By the way, I just have to shout out the fact that Zoya named a polish after me (it's after me, right?) - yay for Megan's!

hehe :)

Finally, the sun was out the next day - so I had to take a picture of this mani in the sunshine to show off OMG. Thanks for looking!


Friday, February 17, 2012

Misa Grey Matters & China Glaze Turned Up Turquoise Stamp


To do this mani I used two coats of Misa Grey Matters on my index, middle and pinky. On my thumb and ring finger I used two coats of China Glaze Turned Up Turquoise. Below is a picture of these two colors before I used my stamp.


First of all, I wanted to say how much I LOVE Grey Matters - it's such a nice color! It's a warm grey and with darker flecks in it. I don't know if it's all that obvious in these pictures but I haven't seen anything quite like it. It kind of reminds me of wet sand, except grey instead of tan, lol. You may know what I am talking about... if you have ever looked closely at sand it has darker flecks in it?? It had really nice coverage and I could have probably gotten away with one neat coat. Turned Up Turquoise on the other hand is really thin and the first coat was very streaky, two coats evened it out fairly well though. It doesn't look anything like this in real life though. It photographed very blue, when it's really bright and pretty turquoise, a lot more green than it shows up here. Also, this has Seche Vite on top, it dries with a slightly matte finish.

To stamp, I used the Bundle Monster plate BM-222. I stamped with Milani Neon Fresh Teal on top of Grey Matters, and then on top of Turned Up Turquoise I stamped with Sally Hansen Wet Cement. I used these just to give a little more of a contrast with the stamp. I sealed everything in with Seche Vite.


PS - Do you noticed how my polish looks wrinkled on my index finger? This happened AFTER I put on Seche Vite but I have never had this happen before... so odd! It is smooth to the touch, it's almost as if Grey Matters wrinkled up slightly underneath the top coat as it dried? hmmm.

Sunday, February 12, 2012

Valentine's Day Kisses Mani

I have seen many bloggers use this stamp for mani's before, but I really wanted to do this for Valentine's Day!


This is two coats of Sinful Colors Secret Admirer. On my ring finger I topped it with a coat of Milani Jewel FX Glitter in Red, Silver and then Red again with a coat of Seche Vite on top. On the rest of my fingers I used a Bundle Monster stamping plate BM02, and stamped the kiss design with Butter London Knees Up and an old Maybelline Mirror Image kit I bought years ago at the dollar store. It doesn't have a color name on it - they call it "Step 2: Mirror Finish Top Coat" of the kit. It's the shiniest silver I own, and it reminds me of pictures that I see of China Glaze Millennium... which I really would love to own. :) Thanks for looking!


Savvy Chocolate & Finger Paints Twisted

This is two coats of Savvy Chocolate, followed by one coat of the amazing Finger Paints Twisted - the beautiful new flakies by Finger Paints. I got all but one of the flakies in this collection, and at some point I will do a post on all of them. I think this is the best of the collection, with all of those colors!

I got a few bottles of Savvy nail polish at Sally's, I have never seen or purchased a bottle of this polish before but they had them up at the register on sale for $1! Of course, I had to buy myself a few bottles... who can resist polish that is only a dollar! Also, sorry that I made a mess when I was painting my nails - I guess this is what happens when I try to watch TV at the same time as doing my nails. Thanks for looking!


Friday, February 10, 2012

Revlon Carbonite Giraffe Stamp

It's been a long time since I've used my stamps, and I got a bunch of bundle monster stamping plates around Christmas (a gift to myself =] hehe). This is two coats of Revlon Carbonite, then I followed it by stamping this design using my Bundle Monster plate BM-215 , and I wish I could tell you what color I used for the purple. It's a really dark purple that I have no idea where I got it from, and it has no labels. Also, I had to take picture of my right hand because I managed to mess up my left hand pretty bad when I was stamping.


This is two coats of Revlon Carbonite followed by a coat of Seche Vite, before I stamped.


Wednesday, February 8, 2012

Milani Hi-Res & Sephora by OPI Sugar Plum Fairies Gone Wild

My friend Debby gave me this gorgeous Sephora by OPI glitter that I had been dying to use. I used three coats of Sephora by OPI Sugar Plum Fairies Gone Wild on my ring finger and thumb. On my index, middle and pinky I used two coats of Milani Hi-Res. I put a coat of Seche Vite on everything.  Sugar Plum Fairies Gone Wild doesn't look as pretty in these pictures as it does in real life. The bigger chunks of glitter are slightly darker and it's SO shiny and pretty. I apologize for the tip wear, I had this on a day before I took these pictures. Thanks for looking!


Tuesday, February 7, 2012

Revlon Whimsical

This is two coats of Revlon Blue Lagoon, followed by two coats of Revlon Whimsical. I used Revlon Blue Lagoon here, if you'd like to see it alone. I forgot to take a picture before adding on Whimsical.


In the bottle, I didn't think Whimsical would be so sheer - I definitely needed two coats of Blue Lagoon under it. The glitter gave me a little bit of trouble, but after two coats I think that it turned out really nicely. The base of Whimsical and Blue Lagoon also matched really well. 

Monday, February 6, 2012

China Glaze For Audrey Feather Mani

I have used feathers on my nails before, here, but this time I wanted to pair it with blue, an idea I saw in a Japanese nail magazine that my friend Debby let me borrow.


To do this mani I started with two coats of China Glaze For Audrey, below.


Then, to add some shimmer I added one coat of China Glaze White Cap.


Then, I cut the same feathers that I used in my previous feather mani, and laid them down on my wet nail after putting a coat of Seche Vite on. I pressed it down using an orange stick and trimmed off the extra feathers that hung over the edge of my nail with a pair of nail clippers. Then I added a coat of China Glaze Fairy Dust on top of the feather on my ring finger to add some sparkle. While that was wet I added two rhinestones, one light blue and one silver, and sealed every nail with Seche Vite. The edges of my nail with the feathers were a little rough and not perfectly trimmed down, so I used a nail file to smooth the edges. I was surprised at how well it tied in with the blue, considering I used a tan, Essie Case Study, the last time and it seemed like the perfect color then too.

Harmony Gelish Need a Tan & Silver Sand

A few months ago I got a Harmony Gelish Soak Off Gel Polish kit at Sally's. If you are unfamiliar with Gel Polish, basically it applies like a nail polish, but after each layer of the kit you need to cure the polish by placing it under an LED light or UV light. If done correctly, you can wear it for 2-3 weeks without any scratches or chips. You can go to a salon and get a gel manicure done for around $30. I first purchased the cheaper UV light they sell for around $16, however I didn't like that the cure time was about 3 minutes per layer. I got the LED light for Christmas, and so far I like it a lot better.

Anyway - I also got some new Gelish colors from my friend Debby for Christmas and after using them I just love how they turned out. I am planning on doing a tutorial with pictures of each step and more explanation at some point when I have the time, but I really just wanted to share these pictures! This two coats of Harmony Gelish Need a Tan, and one coat of Harmony Gelish Silver Sand.


After wearing the Gels for a little more than a week, I took a picture, below, to show how good they still look but you can see how much they have grown out. I got antsy after wearing this for a week and a half and took it off, but I really could have worn it for a lot longer based on how well it stayed on.


Sunday, February 5, 2012

Galaxy Nails

Wow it's been a long time since I've posted! I just don't seem to have much free time lately, and when I do - I am feeling too lazy to blog! I still have been doing my nails several times a week, just not taking the effort to blog about them. However, I am very excited about this design I did a few weeks ago. I saw this galaxy design on youtube, by cutepolish. She does some seriously adorable nail tutorials, several which I have tried out before. I will show you step by step what colors I used, but you can watch her tutorial for even more detail.


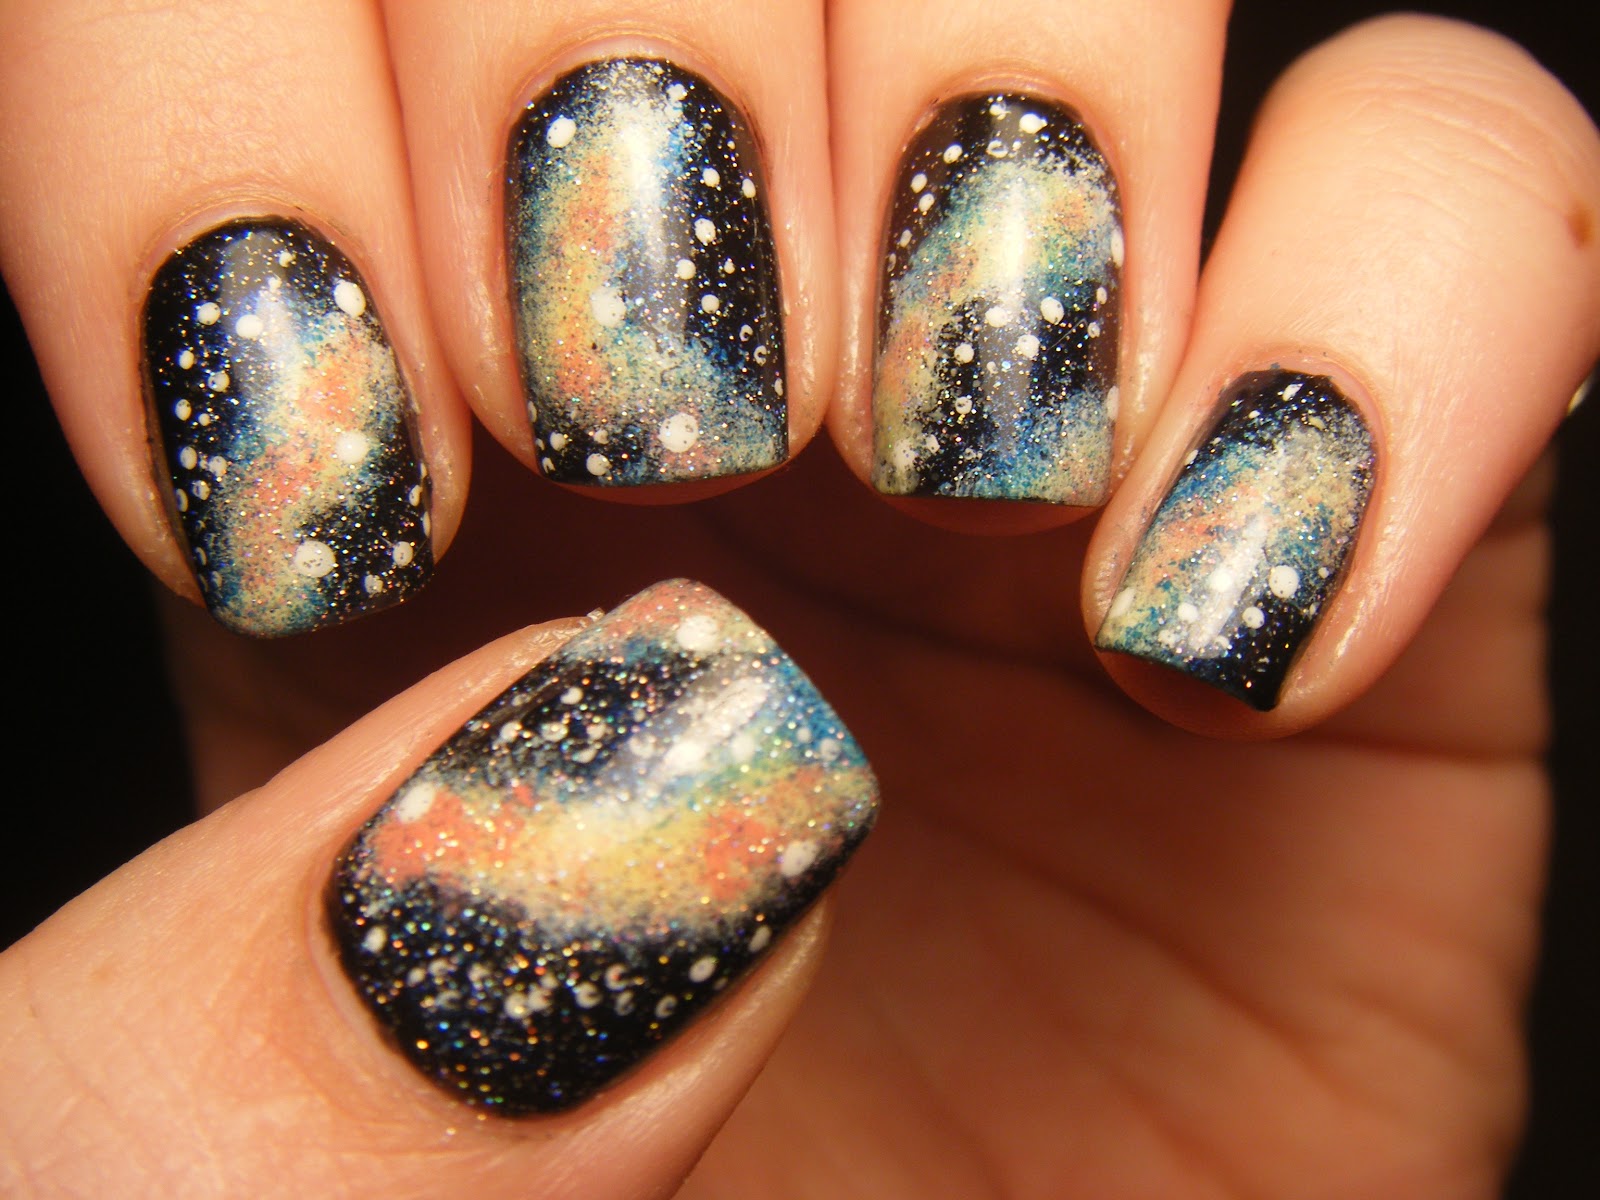
I started with two coats of Orly Goth. I think you could get away with plain black polish, but I wanted to go with something a little glittery. This is a very pretty polish.


Next, I took a small piece of a make up sponge, picked it up with a tweezers and sponged on the following colors in order, Sally Hansen White On, China Glaze Lemon Fizz, Sinful Colors Soul Mate and Sinful Colors Midnight Blue.


After I sponged all of my colors, I used a small dotting tool with Sally Hansen White On and added some little dots to look like some stars.


Then, I added a coat of China Glaze Fairy Dust for some sparkle - and sealed it in with Seche Vite. Thanks for looking!